As an Amazon Associate, we earn from qualifying purchases. Some links on this site are affiliate links at no extra cost to you. Our recommendations are based on thorough research and editorial judgment.

Hand Planer Basics: How Blade Depth Affects Wood Removal
Have you ever struggled with getting a smooth finish while using a hand planer? Figuring out blade depth can make all the difference. For those just starting out, I suggest setting your blade depth between 0.002 to 0.004 inches. This range helps prevent tear-out, which can be a real headache, especially if you’re working with softer woods.
Sure, a deeper cut might speed up material removal, but it can also lead to more damage if you’re not careful.
So, why does this matter? Because sharp blades and planing with the grain are crucial for a great cut. When you take the time to make consistent adjustments based on the type of wood and its grain direction, you’re bound to see improvements in your results.
Here’s the trick: always pay attention to how the wood reacts. Are there any rough spots or inconsistencies in the surface? Tweak your blade depth accordingly to adapt to the unique characteristics of the wood you’re working with.
Truth is, with a little practice and patience, you can master hand planing. Just remember, it’s all about finding that sweet spot in blade depth. Keep experimenting, and it’ll become second nature before you know it.
What will you try on your next project?
Key Takeaways
- Correct blade depth improves cut quality; recommended settings for beginners range from 0.002 to 0.004 inches to avoid tear-out and ensure smooth finishes.
- Deeper blade settings enable quicker wood removal with thicker shavings, while shallow settings result in finer finishes with thinner shavings.
- Understanding wood grain direction is vital; planing with the grain enhances cut quality and allows for deeper cuts, while reverse grain benefits from shallower depths.
- Maintaining blade sharpness and proper chipbreaker settings is essential to reduce tear-out and achieve optimal cutting performance.
- Regular adjustments based on wood type and grain characteristics through trial and error leads to better results in wood removal efficiency.
Understanding Blade Depth: Why It Matters

When you’re using a hand planer, figuring out the right blade depth can really make or break your project. Have you ever started a planing job only to find it’s tearing up the wood instead of smoothing it out? That’s what happens when you’re not careful with how deep you set the blade.
For beginners in woodworking, aiming for a blade depth of around 0.002 to 0.004 inches is a solid starting point. This sweet spot helps you avoid tear-out and gives the wood a nice finish. Going too deep can cause chipping, especially with softer woods, which can be frustrating when you’re just trying to get a clean cut.
Grain direction matters too, and it plays a big role in how well your cuts turn out. If you plan against the grain, you’ll likely end up with more damage than you wanted. So, keep an eye on the wood grain as you work. Regularly checking the blade depth isn’t just a good habit; it also leads to a more uniform cut across the board’s width and saves you materials during the planing process.
Feeling overwhelmed? Don’t be. Just remember that making the right adjustments to the blade depth can significantly improve your woodworking results. Using hand plane routers with adjustable depth features can help maintain this precision consistently. What have you found works best for you? Give these tips a try and see how they change the way you approach your projects.
How Blade Depth Affects Wood Removal

Adjusting the blade depth in your hand plane can really change the game when it comes to removing wood. If you set your blade deeper, you’ll notice thicker shavings flying off, which is perfect for quickly getting rid of material. This can be a huge time-saver when you’re trying to thin down a workpiece fast. But when it comes to that final touch, fine finishing is key. For that, you’ll want to dial the blade depth down to about 0.0040 inches, or 0.10 mm. This not only reduces tear-out but also leaves you with a silky smooth surface.
What about the wood you’re working with? That’s another factor to consider. The type of wood and the direction of the grain play a big role in how you should adjust your settings. It’s worth taking the time to tap the blade just right—either at the front or back—to get precise control. Honestly, the more you play around with different depths, the better you’ll get at striking that balance between efficient wood removal and a quality finish, especially on softer woods. Choosing a hand plane with adjustable cutting depth ensures you can customize the blade settings easily for different tasks.
Recommended Products

Powerful Magnetic Clamping: EB-6116 sheet metal brake delivers 8 tons of uniform magnetic force across the 61-inch beam, ensuring crisp and accurate bends for professional use
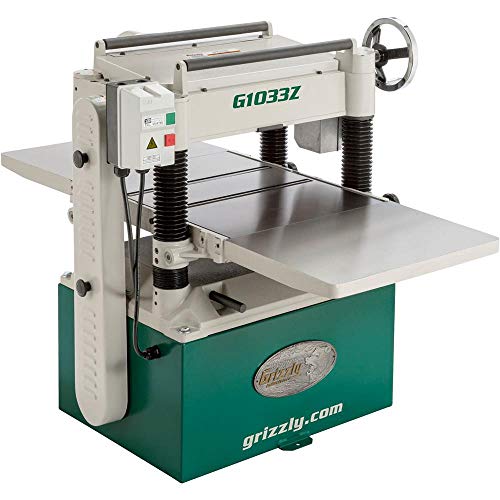
Motor: 5 HP, 230V, single-phase, 23A

1/2" diameter external positive depth stop with three nut locking feature for quick adjustment
Shallow vs. Deep Blade Settings: Their Effects

Do you ever find yourself struggling to get that perfect finish on your woodworking projects? Understanding the difference between shallow and deep blade settings can really make a difference.
Shallow blade settings are great for removing thinner shavings. This gives you a smooth finish but means you’ll have to make more passes to get to the thickness you want. On the flip side, if you crank up the depth, you’ll zip through the material faster, but you might end up with tear-out, especially in softer woods or ones with tricky grain patterns. It’s all about striking a balance.
Aim for a blade height of around 0.10 mm. This sweet spot helps you remove material while keeping the surface nice and smooth. But don’t just take my word for it—experiment with different depths based on the type of wood you’re working with and the direction of the grain.
Here’s the trick: when planing against the grain, take extra care. You want to find that perfect setting for every project to avoid those frustrating uneven surfaces. Using corner clamps can help hold wood securely, ensuring more precise and stable planing results.
Recommended Products

JET BLACK PERFORMANCE COATING: Coated cast iron tables resists corrosion, reduces friction, and eliminates the need for waxing/polishing

Sandsmart control continuously monitors the load on the drum motor and regulates the speed of the conveyor motor to maintain the highest feed rate without overload

Exclusive three high-speed steel auto-set quick-change knife system
Minimizing Tear-Out: Key Techniques
Ever had that frustration of ruining a beautiful piece of wood with unsightly tear-out when planing? It’s a common problem, but there are ways to tackle it effectively.
To keep your projects looking sharp, start by carefully adjusting your blade depth. A shallower cut usually gives you a smoother finish. And don’t overlook the chipbreaker; setting it about 0.0040 inches from the blade edge can really make a difference. This tiny adjustment helps support those delicate wood fibers, which means less chance of tearing.
Now, understanding the direction of the wood grain is crucial. Planing with the grain? You’re likely golden. But if you’re going against it, you’re just asking for trouble. It’s also a good idea to keep your blades sharp. Dull blades will tear fibers instead of slicing smoothly, which can turn a nice board into a mess.
Here’s the trick: play around with your blade adjustments and try to take lighter cuts. It might take some experimenting, but you’ll soon find you’re managing tear-out much better, leaving you with an impressive finish.
In a nutshell, pay attention to your blade depth, grain direction, and sharpness. These simple tweaks can keep your woodworking projects looking their best. What kind of projects are you working on that could benefit from these tips? Investing in quality tools with durable material construction can also enhance the quality of your work and reduce frustrations like tear-out.
Recommended Products

Powerful 15 AMP motor with 12,000 RPM for improved performance

Compact with less weight for easy transporting to the jobsite

Powerful 10.9 AMP motor with 15,000 RPM for improved performance
Adjusting Blade Depth for Different Wood Types
Finding the right blade depth for different wood types can feel like a bit of a puzzle, right? You want your planing results to be just right, so here’s the scoop on how to adjust the blade for success.
When you’re working with softwoods, it’s helpful to set the blade depth a little deeper—think around 0.1 mm to 0.5 mm. This tweak can really optimize performance and help cut down on tear-out. On the flip side, hardwoods require a more delicate touch. Aim for those finer adjustments, like 0.10 mm (or about 0.0040 inches). Why? Because hardwoods have a tricky grain structure, and finer cuts can help achieve smooth, clean results.
So, how do you figure out what works best? It really depends on the type of wood and the grain direction. Normal grain usually means smoother cuts, while reverse grain often demands lighter cuts to avoid problems. This is definitely a case where trial and error pays off. Keep experimenting with different settings until you find what seems to click for your specific projects.
In short, adjusting your blade depth according to the wood type can take your planning game to the next level. Are you ready to give it a try? Also, for maintaining the tool’s efficiency, consider the durability and materials of your planer blades to match your specific project needs.
Recommended Products
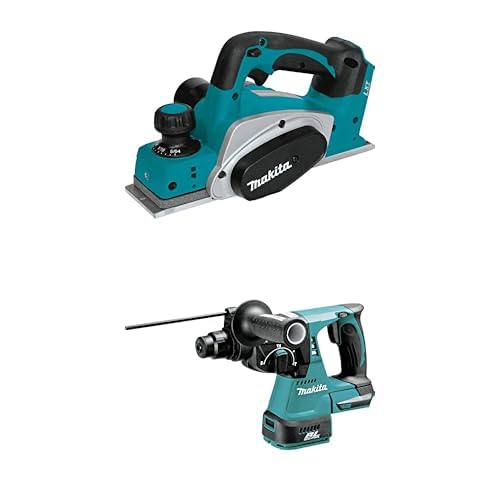
Planes Up to 3-1/4" Wide and 5/64" Deep in a Single Pass

Haswing Cayman 48 INCH Shaft Bow Mount Trolling Motor is designed and engineered to run quieter than ever before. It's so quiet that the fish will never hear you coming. With variable speed will let you dial in your desired speed and provide more precise, smoother adjustments plus improved control. Moreover the variable speed is the lower power consumption of the motor, it can increase battery life quite a bit at any speed. Also the trolling motor suitable for boats weighing up to 2750LBS

Leading Manufacturer Of High-Quality Products
The Impact of Blade Sharpness on Planing
Have you ever struggled with planing wood and felt like you were wrestling with the grain instead of working with it? Proper blade sharpness is the secret ingredient to achieving impressive results. A sharp blade makes cleaner cuts and requires less muscle from you, which means you can glide through your project smoothly without tearing up the wood.
Take Japanese planes, for example—they usually have bevel angles around 25-30 degrees, which help create those fine, delicate shavings. It’s a beautiful thing when a tool works with you rather than against you. On the flip side, dull blades can really put a damper on your plans, especially when facing tricky grain patterns. So, why does this matter? Because a sharp blade doesn’t just improve your cuts; it also enhances your overall woodworking experience.
Material choice plays its part too. High-carbon steel blades often need more frequent sharpening compared to high-speed steel options, so keep that on your radar when selecting tools. Another thing worth mentioning is the blade projection. Keep the blade just above the sole of the plane for maximum effectiveness. It helps you avoid accidental gouging while making the most of that sharp edge.
Regular maintenance is crucial if you want to keep your planing performance on point. After all, a little care goes a long way in extending the life of your tools. So next time you’re gearing up for a project, take a moment to check the sharpness of your blades—trust me, it makes a world of difference. Using high-quality materials like C3 tungsten carbide can also make a significant difference in tool longevity and cutting efficiency.
Recommended Products
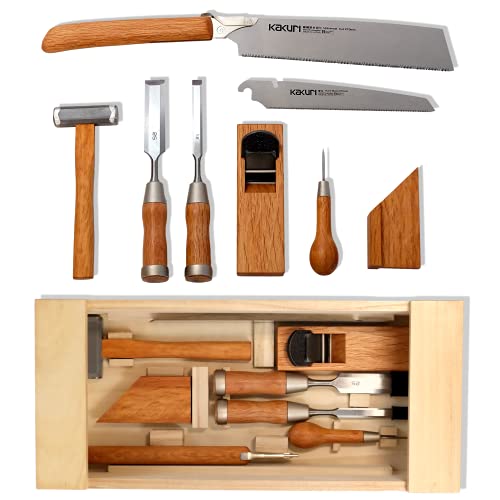
[QUALITY JAPANESE WOODWORKING TOOL SET] Discover the highest-grade Japanese carpentry tool set from KAKURI, trusted by professional artisans worldwide—from musical instrument makers to joiners, furniture craftsmen, and carpenters. This premium set comes in a traditional Japanese toolbox made of lightweight, durable paulownia wood, designed for both protection and portability.

Cut like a pro: Crafted for the home chef, our modern 15-piece knife set includes the essential knives to cover all your meal prep needs for years to come.

SUPERIOR PERFORMANCE: the Heritage series features beautifully sculpted handles, high-polished blades, and a patented Transitional Bolster, streaming the bolster into the handle for a more comfortable grip
Best Practices for Blade Depth Adjustment
Have you ever wondered how the right blade depth can make or break your woodworking project? It’s crucial to get this part right, especially when aiming for those fine cuts. When you’re looking for precision, setting your blade depth between 0.0040 to 0.010 inches (0.1 to 0.25 mm) will really help minimize tear-out and give you a cleaner edge.
On the other hand, if you’re dealing with rough lumber, don’t be afraid to increase that blade depth to about 0.025 to 0.050 inches (0.6 to 1.3 mm). In these cases, a deeper cut will make your life easier and your work more efficient. Remember to adjust the chip breaker as well to prevent any clogging.
This brings us to another point: practice makes perfect. Have you ever noticed how the direction of the wood grain can impact your cuts? When you’re making cuts with the grain, deeper adjustments usually yield better results. Conversely, when you’re working against reverse grain, shallower cuts can help you achieve a smoother finish with your Japanese plane.
Here’s a tip: always keep an eye on grain direction to determine the best blade depth for your project. Truth is, understanding these nuances can significantly improve the overall quality of your work. Don’t hesitate to experiment and adjust until you find what works best for you. Also, using hand planes with ergonomic handle design can reduce fatigue and improve control during these adjustments.
Troubleshooting Common Issues With Blade Depth?
Have you ever struggled with getting the right blade depth while woodworking? It can be a real headache, especially when you’re aiming for those perfect cuts. The first step is to ensure your tool is properly aligned; if the cutting edge is uneven, you’re not going to get the results you want.
When it comes to fine cuts, aim for a blade depth of about 0.0040 inches (or 0.10 mm). If you’re seeing a lot of tear-out, it’s a sign that your blade is too high. On the flip side, if your shavings aren’t coming out well, it might be time to lower that blade.
It’s also worth experimenting with different depths, especially when working with various types of wood. Japanese woods, for instance, can require some adjustments to get the best results.
Consistent maintenance and keeping your blades sharp are key. Trust me, there’s nothing worse than dealing with depth problems when you could’ve avoided them with a little upkeep. A well-maintained blade isn’t just smoother; it also means you’ll have a much more enjoyable planing experience. Choosing blades made from high-quality materials like chromium-vanadium steel can significantly enhance durability and sharpness in woodworking tasks.
Frequently Asked Questions
How Do We Adjust the Plane Depth to Take a Deeper Cut?
To adjust the plane depth for a deeper cut, we’ll apply depth adjustment techniques, guarantee ideal blade settings, and keep up with planer maintenance tips. Let’s experiment to find the perfect balance for various woods.
What Are Common Planer Mistakes?
As we glide our planer over wood, we shouldn’t overlook common mistakes like improper setup. We can avoid tear-out by ensuring blade depth is just right and maintaining consistent pressure throughout, achieving a smooth finish.
What Is the Recommended Depth of Cut on the Planer?
The recommended depth of cut on a planer is between 0.002 to 0.005 inches for fine finishes. Using blade adjustment techniques helps us achieve ideal cut recommendations, ensuring depth settings explained suit our specific wood types.
How Much Wood Should the Thickness Planer Remove in One Pass?
We recommend taking 1/32 to 1/16 inch in one pass, considering wood species impact and moisture content effects. Each pass depth consideration helps us achieve smoother finishes while avoiding damage or excessive wear on our planer.


