As an Amazon Associate, we earn from qualifying purchases. Some links on this site are affiliate links at no extra cost to you. Our recommendations are based on thorough research and editorial judgment.

How to Mark Cut Lines for Different Saw Types
Got a project lined up and wondering how to mark cut lines for different saw types? You’re not alone. Getting those lines right can make or break a cut, and nobody wants to deal with splintered edges. Here’s how to nail it.
For miter saws, it really helps to extend your cut lines and remember to add half arrows. Why is that important? Those arrows show you which side is the waste, saving you from second-guessing your cuts.
When you’re using a table saw, keep your measurements aligned to the same reference point for those parallel cuts. If you skip this step, you might end up with uneven pieces. Trust me, clear marks on the remaining board are crucial to make your work easier.
Curved cuts with bandsaws can be tricky, but there’s a simple fix! Use flexible rulers to mark your lines. They bend to the shape you need, which makes the whole process smoother.
So, why does this matter? Precise marking means cleaner cuts and less material wasted. It’s about making your life easier and your projects look professional.
In summary, take a moment to mark your cut lines accurately, and you’ll save yourself a lot of hassle down the road. What tips have you found helpful when marking cuts?
Key Takeaways
- Use a sharp pencil or marking knife for hand saws to reduce splintering and create clear cuts.
- For miter saws, incorporate half arrow marks to show the waste side and extend cut lines for better visibility.
- Draw clear marks on the remaining side of the board for table saws, ensuring cut lines are straight and accurately measured.
- Utilize flexible rulers or templates to mark complex curves for bandsaws, practicing on scrap materials for improved control.
- Consistently measure from the same reference point when marking cuts to ensure precision and prevent material waste.
Understanding the Importance of Accurate Cut Lines

When you’re diving into woodworking, it’s easy to overlook how crucial accurate cut lines really are. Have you ever made a cut only to find it veered off course? Clear markings, like half arrow marks, help pinpoint the waste side of the material—this is essential for that straight cut you need. If your cut lines aren’t marked well, it can lead to messy misalignments, which is such a hassle when you want everything to fit perfectly together.
Try this: using either a pencil or a razor blade to make your marks can provide a clear guide as you cut. It’s simple but effective. Keep in mind that different saw types, like miter saws, may require specific marking techniques, especially when you’re working with grain direction and angles. So, what’s the takeaway here? When you prioritize accurate cut lines, you not only improve your cut quality but also make sure each piece comes together seamlessly in your projects.
Frankly, taking a few moments to focus on your cut lines can save you a ton of time and frustration down the road. So, the next time you’re about to cut, remember that extra attention to detail can make all the difference. What cutting tips have worked best for you? Additionally, using tools with variable speed settings can help you make precise cuts that align perfectly with your markings.
Choosing Your Marking Tool for Different Saw Types

Selecting the right marking tool for your saw type can really make a difference in getting those cuts just right. Ever had a frustrating moment where you thought you measured everything perfectly, only to have it all go sideways? You’re definitely not alone. Here’s how to make it smoother.
For hand saws, grab a sharp pencil or a marking knife. This ensures you have a clear cut line that minimizes splintering. Think about it—if you don’t have a solid line to follow, you’re just asking for trouble.
When it comes to miter saws, use a half arrow mark to show the waste side. This simple trick helps keep everything aligned consistently. It’s little things like this that can save you from making costly mistakes.
With bandsaws, you might want to consider using a sticky note or chalk for your markings. These choices stick around, even when the blade drifts a little. So, why does this matter? It makes sure your markings are easy to see, helping you stay on the right track.
For table saws, always mark your cuts on the board’s remaining side. Line it up with a straight edge for guidance. Getting this right can avoid any mix-ups that could ruin your workpiece.
Lastly, a razor blade can work wonders when it comes to precision marking. It leaves a thin line that’s perfect across various saws. Honestly, it’s all about providing accuracy and cutting down on mistakes.
Using additional tools like a stud finder can help you locate hidden supports, ensuring your cuts avoid structural components and maintain safety.
Recommended Products

6 pt Carbide Flail Cutter Complete Drum Kit for Edco CPM-8 Scarifier/Concrete Planer - General Setup
Complete Deluxe Bushed Drum Replacement Kit Designed for Edco CPM-8 Scarifier/Concrete Planer
Replacement Kit Designed for Edco CPM-8 Scarifier/Concrete Planer

100% Grout-Free & Watertight System: Eliminate the hassle of grout maintenance forever. Made from robust, non-porous PVC, this surround is naturally water resistant, providing a seamless, wipe-clean surface that guarantees a watertight seal when installed correctly.
Marking Angles for Miter Saws

Marking angles accurately for miter saws can feel tricky, right? But getting those cuts clean and precise is essential if you want your project to turn out well. You’ll want to grab a protractor or a miter box to set your angles—45 degrees is usually the go-to for standard miter joints. Once you’ve got that angle figured out, take a moment to mark your cut lines clearly on the wood with a sharp pencil. Trust me, extending that line across the face of the board makes it so much easier to see.
For an extra layer of accuracy, don’t skip using a framing square to make sure your angle marks are square to the board’s edge. It seems simple, but a little attention to detail can save you major headaches down the line. And here’s a handy tip: don’t forget to mark a crow’s foot or half arrow on the waste side. This little trick saves you from any confusion about which part you’re cutting off. Always double-check your measurements before you go ahead and cut; it’s the best way to avoid mistakes. Also, choosing the right blade diameter for your miter saw helps ensure clean cuts and optimal performance.
Recommended Products
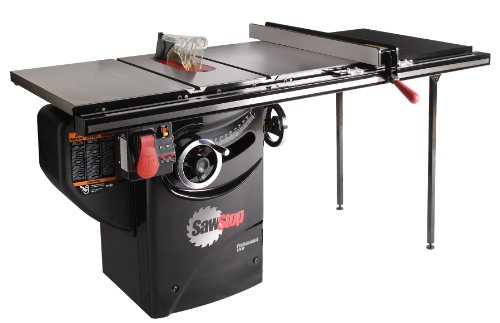
36-INCH T-GLIDE FENCE ASSEMBLY: The 36-inch T-Glide Fence & Rail are made of heavy-gauge steel for sure lockdown and reliably square cutting for years without deflection.

Great simple DIY foam crown molding for regular walls and easy to use for indirect LED or rope lighting. *** MADE IN USA ***

MADE IN THE USA! - FlowGuard is 100% Manufactured in the USA. High Strength .018 heavy gauge painted aluminum will never rust or deteriorate. Full front and rear hem doubles material thickness in high stress mounting area to withstand the most extreme rainfall, snow loads, and winds. Available in a variety of colors White, Thermal Thaw Black, Brown, and Matte Aluminum, STAINLESS STEEL 1/2" #8 twin thread pierce point zip screws.
How to Mark Your Table Saw Cuts for Perfect Parallelism
How can you ensure your table saw cuts are perfectly parallel? It all starts with measuring from the same reference point on your board. This consistency is key to making sure everything lines up perfectly for your project.
Try this: use a straight edge to draw a clear line for your cut. A sharp pencil or a marking knife works wonders here—you’re looking for accuracy, and a good marking tool makes it easier to see what you’re doing. Don’t forget to add a half arrow symbol to point out the waste side; this little detail really helps avoid any confusion down the line.
When it comes to positioning your board, make sure you’re using either the miter gauge or the fence to get those marks where they need to be. Honestly, double-checking all your measurements can save you from a big headache later. Even small errors can lead to wasted material, so take a moment to make sure everything’s aligned just right.
A few extra steps now can lead to much better cutting results. So why do all this? Because getting those cuts right not only saves material but also keeps frustration levels in check. Remember, attention to detail at this stage sets you up for success in the rest of your project. For tasks requiring assembly or adjustments, having the right tools like a universal wrench design ensures precise alignment and ease of use.
Recommended Products

The top surface of this plate is precision ground to achieve a high degree of flatness and the accuracy is +/-.0004. It is a Grade B (Grade 1) plate.

Zero clearance track saw cutting system delivers precise, straight, splinter-free cuts.Power Tool Type Corded
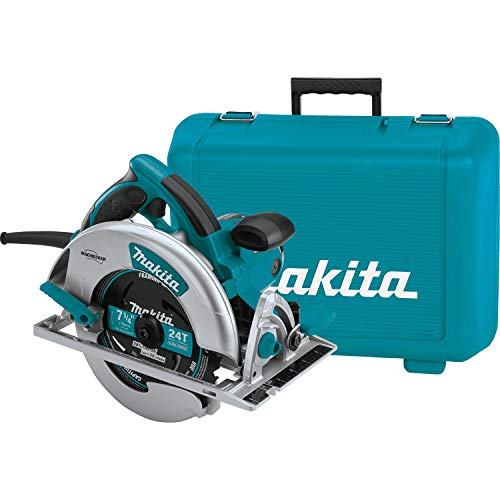
Electric brake for maximum productivity
Best Practices for Marking Curved Cuts on Band Saws
Marking curved cuts on a band saw can feel a bit tricky, right? It’s one of those tasks that requires precision, but with a few simple steps, you can make it much easier. Start by grabbing a good marking tool, like a pencil or chalk. The key here is to trace your desired curve clearly—don’t underestimate how helpful a clean line can be.
When it comes to marking, always do it on the waste side of the material. Why? Well, that way, you won’t accidentally cut into the area you want to keep. For those more complex curves that can make you scratch your head, consider using a flexible ruler or even a template. These tools can really help guide your markings, ensuring they’re spot on.
You might also find it useful to define initial points along the curve with a straightedge. This gives you a solid starting point, making it easier to follow the curve as you cut. Now, don’t skip this part: practice your cutting technique on some scrap materials first. It’s a great way to fine-tune your control and ensure you’re ready for the real deal.
In the end, getting your cuts right isn’t just about having the right tools or techniques. It’s about knowing how to mark that curve with confidence. What are your go-to tips for marking and cutting?
Also, consider the cutting capacity of your band saw to ensure your markings align with what the saw can effectively handle.
Recommended Products

【Powerful 10 Amp Motor for High Performance】Experience the unbeatable power of our 10 amp motor that ensures exceptional performance without the risk of burnout. This metal band saw cuts through steel effortlessly, leaving behind smooth, burr-free kerfs, and without any burning. Our tool operates with low noise levels and offers adjustable cutting angles from 0 to 45 degrees. It swiftly and efficiently saws through a wide range of materials including steel, aluminum, composite cable, angle iron, steel pipe, solid steel, aluminum profile, PVC pipe, and stainless steel.

This machine is designed to operate on 115-volt electrical systems only. NOT FOR USE in countries that operate on 220-volt electrical systems!

Fits Laguna Models: LT14-3000, LT14SE, LT14SEL, 1412, 14 BX, LT-SUV, LT16-3000 and LT18-3000, LAG18-BX and LT16
Best Methods for Marking Straight Lines With Circular Saws
Have you ever tried making a straight cut with a circular saw, only to end up with a jagged edge? It can be frustrating, but don’t worry; there are some straightforward methods to help you get those precise cuts you’re aiming for.
First things first, grab a tape measure and mark your desired length on the wood. Making sure your measurements are spot on is key. Once you’ve got that down, use a straight edge or a chalk line to create a clear guideline. This way, your marking lines stand out against the wood grain, which makes them easier to follow.
Here’s the trick: when you mark your line, opt for a sharp pencil or a razor blade. This can help reduce splintering and gives you a cleaner line. And here’s a little tip that makes a big difference—draw a small arrow next to your cut line to indicate the waste side. Why does this matter? It keeps things clear and helps prevent any mix-ups, especially if you need to rotate the wood while cutting.
Using a high-quality drywall T-square with clear visibility features can further improve the accuracy of your cut lines and guide your saw along the perfect path.
In the end, taking these extra steps not only leads to better cuts, but it can also give you a sense of confidence while using your saw. So, the next time you’re ready to tackle a project, remember these simple tips for achieving those straight lines. What project will you start with next?
Recommended Products
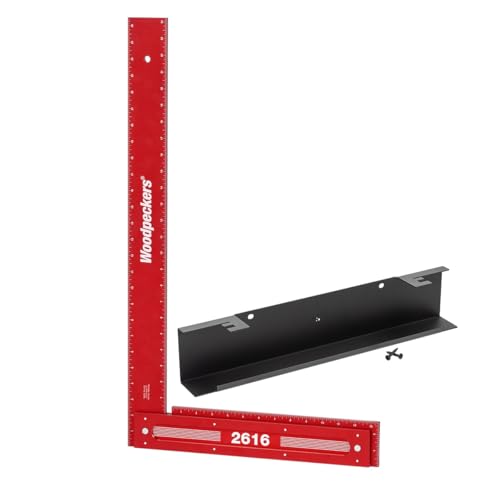
SPECS - You will receive a 26-inch precision woodworking square. Accurate to within 0.001 inch along the full length of the tool. Made in the USA.

SPECS - You will receive a 6-inch & 8-inch precision woodworking square. Accurate to within 0.001 inch along the full length of the tool. Made in the USA.

Premium Home Improvement Cutting Tools: Track saw guide turns circular saws into precision, track-guided tools
Troubleshooting Common Marking Issues
Have you ever struggled to get a straight cut with a circular saw? It can be a real headache, especially when marking isn’t done right. One of the biggest culprits? Those single line marks. They might seem simple, but they don’t show you which side is waste and where your cut needs to start and end. Without clear markings, it’s easy to make mistakes that throw off your entire project.
Try this: instead of a single line, go for a half arrow. This little trick clearly indicates the waste side, making it easier to line up your cut no matter how you’re holding the board. It’s also worth double-checking your tape measure and marking tools as you go. Boards can rotate and shift, so keeping an eye on your measurements will save you from misalignment. If your paint’s glopping up or your measurements aren’t steady, those inaccuracies can mess with both your cut and saw blade performance.
So, why does this matter? Because having clear and accurate lines saves you time and resources. The last thing you want is to cut twice because your first attempt went awry all due to poor markings. By paying attention to these details, you can improve your cutting game and feel more confident in your projects.
For added efficiency and protection of materials, consider using tools with damage prevention features to avoid unwanted surface damage during handling.
Enhancing Clarity With Visual Aids and Symbols
Have you ever found yourself staring at a cut line, unsure of which side to chop? It’s a common struggle in woodworking, and clarity in marking those cut lines is key to staying on track. Try using distinct symbols like a half arrow or a crow’s foot. These not only show the waste side but also point you in the right direction to cut. Honestly, it can clear up a lot of confusion that comes from those basic single line marks that just don’t cut it.
Now, here’s the trick: those half arrow marks work well even if you turn your boards around. That consistency saves time and helps you avoid mistakes. It makes a real difference when you’re focused on getting that perfect cut! To take it a step further, think about bringing in visual aids like illustrated examples or templates for the specific saw types you’re using.
The best part is that these tools not only enhance accuracy in your cuts but also streamline the entire process. You’ll spend less time worrying about misalignment and wasted material, and more time enjoying your carpentry projects. Utilizing saws with features like a tool-free blade change can further boost efficiency and reduce downtime.
So, why does this matter? It fosters a smoother workflow, giving you a better overall woodworking experience.
In the end, clear markings and handy visual aids can really elevate your projects. If you haven’t tried these out yet, why not give it a go next time? What’s holding you back from making your cutting process easier and more efficient?
Frequently Asked Questions
What Is the Proper Technique for Marking a Cutting Line Across a Board?
To achieve cutting accuracy, we should use sharp marking tools for clear lines, double-check measurements, and employ techniques like a half arrow mark for waste side indication. Consistency improves our overall cutting precision.
How to Mark Lumber for Cutting?
Like skilled navigators charting a course, we must use precise measuring techniques and sharp marking tools to draw clear lines on lumber. This guarantees cutting accuracy, guiding our saws with confidence and purpose, minimizing waste.
Are Circular Saw Guides Worth It?
Absolutely, circular saw guides are worth it! They enhance circular saw accuracy, boost safety, and leverage circular saw advantages, ensuring our cuts are straight and precise. We’ll definitely appreciate the improved results and reduced errors.
How to Mark Wood for Cutting With a Circular Saw?
To guarantee cutting accuracy with our circular saw, we should use sharp marking tools to clearly outline our cut line on the waste side. A straightedge can help us apply effective circular saw techniques for precise results.


