As an Amazon Associate, we earn from qualifying purchases. Some links on this site are affiliate links at no extra cost to you. Our recommendations are based on thorough research and editorial judgment.

Miter Saw Setup: Step-by-Step Alignment Guide
Have you ever tried cutting wood only to find your miter saw isn’t aligned? It can be super frustrating and result in messy cuts. To avoid that headache, you want to start by making sure the saw is unplugged for your safety.
Now, grab a combination square and check the blade alignment at 0 degrees. If you notice any gaps, tweak the blade with an Allen wrench until everything lines up perfectly.
Next up, let’s make sure the fence is aligned too. Place the square against the fence and see if there are any gaps. If adjustments are needed, make them, then tighten those screws firmly to lock everything in place.
So, why does this matter? A well-aligned miter saw not only improves your cuts but also boosts your confidence while working.
Once you’ve done your adjustments, verify the bevel angles using the square. It’s a good idea to make a few test cuts with scrap wood at common angles to see how everything holds up.
The best part is that these simple steps can dramatically improve your cutting precision. Remember, taking the time to set up right can save you from frustration down the road.
Have you ever experienced the benefits of good alignment when using your saw? It’s definitely worth the effort!
Key Takeaways
- Start by unplugging the saw for safety before checking blade and fence alignment with a combination square.
- Use an Allen wrench to adjust the blade until it sits flush against the square for accurate cuts.
- Test blade alignment and fence alignment by making cuts on scrap wood at 0 and 45 degrees.
- Regularly check bevel and miter angles and ensure adjustments are locked in for precise cutting.
- Maintain cleanliness and inspect blades regularly to prevent dust buildup and ensure optimal saw performance.
Why Accurate Alignment Matters for Your Miter Saw

Have you ever faced the frustration of making a cut, only to find it’s just not right? Accurate alignment with your miter saw is crucial if you want those cuts to turn out spot-on every single time. When the blade’s lined up perfectly, you can make cleaner, more precise cuts. On the flip side, misalignment? That can lead to uneven edges and potentially wreck the integrity of your whole project. Who wants that kind of headache?
To keep everything aligned, make it a point to regularly check and adjust the fence on your saw, especially after moving it or swapping out blades. You’d be surprised how even a minor adjustment can drastically impact the quality of your cuts. Think of it this way: taking a few moments to ensure everything’s in line can save you a ton of time and materials in the long run.
Prioritizing accurate alignment not only helps in making great cuts but also contributes to the longevity of your saw and blades. Plus, it lowers the chances of any mishaps that could lead to damage. Honestly, who wouldn’t want to work more efficiently and effectively?
The bottom line is that an aligned miter saw helps you tackle complex projects with confidence. So, next time you’re about to start cutting, ask yourself: “Is everything aligned properly?” A little time spent on alignment can pay off immensely in both quality and satisfaction. Using tools crafted with traditional manufacturing methods ensures a precision that complements your aligned miter saw perfectly.
Essential Tools for Miter Saw Setup

Ever tried getting a miter saw set up precisely only to find it’s slightly off? It can be super frustrating, but having the right tools can really make the job smoother.
A combination square is a must-have. It helps ensure your blade is aligned and squared properly, so take the time to get it right. If you’ve got the Allen wrench that matches your miter saw model, great! That little tool is perfect for tightening or adjusting the screws that keep everything in place.
You might want to grab a digital angle gauge while you’re at it. This nifty tool gives you accurate readings for both the blade and the bevel. Why does this matter? Because it means every cut you make is spot on, which saves you time and materials down the line.
Don’t forget about having some scrap wood handy once you’ve made your adjustments. It’s smart to test your cuts before diving into a bigger project. This way, you can double-check your settings without the pressure of working on the final piece.
These tools don’t just make the setup easier; they ensure you have a precise experience with your miter saw. Remember, a little preparation goes a long way in avoiding headaches later on. So, what tools have you found helpful when setting up your miter saw? Using high-speed steel durability tools can enhance the longevity and reliability of your equipment during setup.
Recommended Products

Easy to Use - The square head can be moved up and down on the rule with a lockable assembly and a specially designed bolt to engage the slot for stability and versatility while measuring.

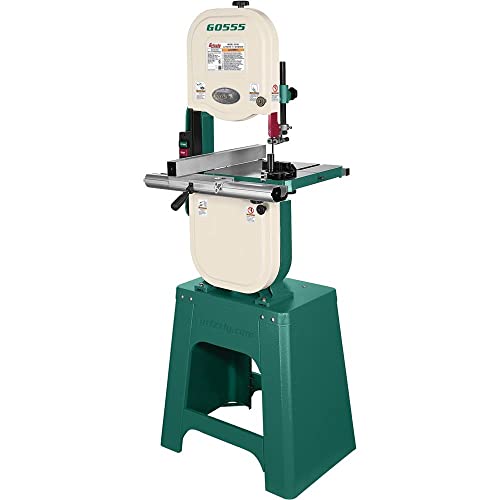
Crafted from Heavy Weight CNC Machined aluminum components - Assembled with 34 Swiss-turned stainless-steel parts - Guide Bar meticulously made of custom rolled steel

FIVE TOOLS IN ONE: The tool works as a digital angle finder, inclinometer, miter calculator, protractor and level.
Step-by-Step Guide for Checking Blade Alignment

Is your miter saw giving you more headaches than clean cuts? A common culprit might be a misaligned blade. Getting that blade aligned right is key to making your cuts accurate and clean.
Start by making sure your saw’s unplugged—safety first! Place a combination square against the blade when it’s sitting at 0 degrees. If you notice any gaps between the blade and the square, that’s a telltale sign of misalignment. To fix this, grab an Allen wrench and loosen the adjustment screws on either side of the blade mount. Adjust the blade until it sits flush with the square. Once it’s lined up perfectly, tighten those screws back up securely.
Here’s the trick: after tightening, manually spin the blade. If it wobbles, that could mean it’s warped and may need to be replaced. Nobody wants to deal with off-cut pieces, right? After that, double-check that the blade is square to the table. You can do this by measuring to confirm it’s 90 degrees using your combination square.
Finally, test the alignment with some scrap wood. Make a couple of cuts at both 0 and 45 degrees to see how it performs. It’s the best way to know for sure if you’re good to go or if further adjustments are needed.
For optimal accuracy and dust management, consider using a saw equipped with a high-efficiency dust management system to keep your workspace clean and your line of sight clear.
Align Your Miter Saw Fence for Perfect Cuts
Are you tired of making cuts that just don’t seem to come out right? It could be time to focus on your miter saw fence alignment. After making sure your blade is spot-on, the next crucial step is to ensure your miter saw fence is perfectly aligned. A misaligned fence can lead to not-so-perfect cuts, and that’s definitely not what you want.
Try this: Grab a combination square and use it to check if the fence is parallel to the blade. Any gaps? That could spell trouble for your accuracy. To fix this, loosen the bolts or screws holding your fence in place. This will let you reposition it until it’s just right. Once you’ve made those adjustments, tighten everything back up safely to make sure that fantastic alignment stays put.
Honestly, it’s a good idea to regularly check the alignment of the fence, especially if you’ve been moving your saw around a lot. You want everything to be ready to go when inspiration strikes! Before diving into your next project, grab some scrap wood and do a quick practice cut. This little step will help you confirm those adjustments were successful and ensure you’re primed for perfect cuts.
Truth is, accuracy really is key when you’re working with a miter saw. Keeping that fence aligned might seem like a small thing, but it can make a world of difference in your finished project quality. Using tools with ergonomic features can also improve your control and reduce fatigue during cutting tasks. So, how often do you check your miter saw setup?
Recommended Products

Your purchase includes One Dewalt 10-Inch Wet Tile Saw, 10-Inch XP4 Porcelain Tile Blade, Submersible Pump, Water Pan, Side Water Tray, Rear Water Tray, Cutting Cart Side Extension, Angle/Rip Guide, Blade Wrench & Hex Wrench
1 HP motor, pre-wired 110V / 220V compatible, single-phase (11A at 110V, 5.5A at 220V)

1 of Bosch CM10GD Compact Miter Saw - 15 Amp Corded 10 Inch Dual-Bevel Sliding Glide Miter Saw with 60-Tooth Carbide Saw Blade
Adjust the Bevel for Accurate Cuts
Adjusting the bevel on your miter saw can feel like a tricky task, but it’s crucial for nailing those precise cuts, especially at angles like 45 degrees. Have you ever struggled with your cuts not lining up? Here’s a simple trick to get it right.
Start by checking the bevel adjustment from the zero-degree position. Grab a combination square and make sure it’s perfectly aligned with the blade. You shouldn’t see any gaps—if you do, it’s time to tweak things. For those 45-degree cuts that you really want to nail, adjust the bevel gauge and check that it properly stops at that angle. Re-verify with your combination square to be certain.
If your saw has dual bevel capabilities, don’t forget to check both the left and right tilts. You’ll want to make sure they both calibrate without any hassle to the angle you need. The bevel adjustment screws are typically located near the gauge, so keep an eye on them and make any tweaks as necessary. It’s a good idea to regularly check the calibration, especially after you’ve transported your saw or put some heavy hours on it.
So, why does this matter? Well, ensuring that your bevel is set right saves you from having to make extra cuts or dealing with mess-ups later on. Additionally, using a miter saw stand with stability and durability features can help maintain accurate bevel adjustments by minimizing saw movement during cutting.
How to Achieve Precise Miter Angles
Achieving precise miter angles is crucial in woodworking. Think about it: even a tiny mistake can lead to joints that just don’t fit right, and nobody wants that after putting in all that effort. Start by setting your miter gauge at the angle you’re aiming for, then double-check with a protractor to make sure it’s spot on.
Next up, it’s time to ensure everything lines up. Grab a combination square to check the alignment between your blade and the miter gauge. If you notice any gaps, don’t panic! Just loosen those screws, make the adjustment, and lock it back in place. Remember, it’s all about getting everything just right before you make those cuts.
When you’re feeling confident, test out your miter cuts on some scrap wood at common angles like 15°, 30°, and 45°. This is where you’ll confirm everything’s accurate before diving into the real project. So, why does this matter? Consistency is key! After transporting your saw or using it for a while, take a minute to recheck and adjust those angles. A little time spent on this can save you a lot of headaches down the line. Using the right saw blade tooth count can also impact the precision and smoothness of your cuts, especially when working with delicate angles.
What to Do If Your Miter Saw Isn’t Cutting Right?
When your miter saw isn’t cutting right, it can really throw a wrench in your project. You might feel like you’ve done everything right—setting up those precise angles and lining everything up perfectly. But here’s the first thing you should check: the blade. A warped or damaged blade can mess up your cuts big time.
Try this: grab a combination square and check if the blade is square against the fence. If there are any gaps, it’s time to adjust. Don’t forget to lock the miter gauge and bevel gauge at the 0-degree position. This step is crucial; any movement at this stage could lead to those pesky inaccurate cuts we’re trying to avoid.
Now, here’s the trick: before committing to your actual cut, do some test cuts on scrap wood at a few different angles. This can really help pinpoint where things might be going off track. By adjusting the miter and bevel angles based on what you discover, you’ll get back to making those clean, precise cuts. Also, regularly checking and replacing blades ensures clean cuts and maintains the saw’s performance.
Recommended Products
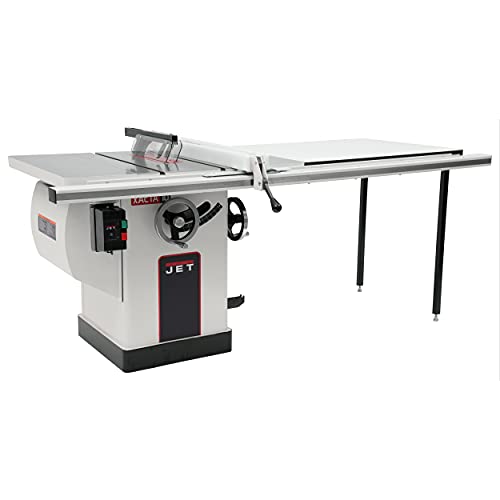
Exclusive 50-in. commercial XACTA fence II with T-square design
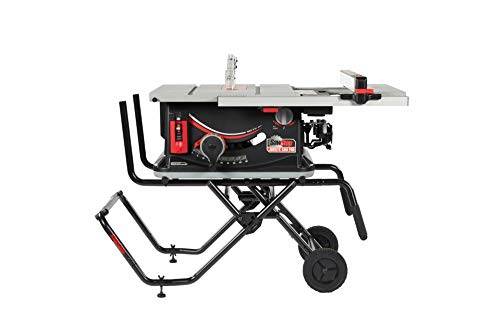
Compact stowed dimensions (26.5" L × 29" W × 45" H) make transport and storage easy

Telescopic arm for increased cutting capacity, ergonomic handle and transparent retractable protective guard
Simple Maintenance Tips for Ongoing Accuracy
Have you ever felt the frustration of a miter saw that just doesn’t cut as accurately as it should? Keeping that saw in tip-top shape is key to getting those precise cuts you need. Here are some straightforward tips for maintaining the ongoing accuracy of your miter saw.
First off, regular cleaning should be at the top of your maintenance list. Dust and debris can really mess with how well your saw performs, so make it a habit to clean the blade and other components frequently. A little effort here goes a long way in ensuring clean cuts.
Now, let’s talk about the blade. It’s one of the most vital parts of your saw. You should check for any signs of wear or damage regularly. If you notice that the blade is warped or dull, replace it without delay. A sharp, straight blade makes all the difference when you’re after precision cuts.
Here’s the trick: lubricate the moving parts regularly. Focus on the pivot points to keep everything moving smoothly. This simple step not only aids in ease of use but also helps with maintaining proper alignment.
Speaking of alignment, taking a moment to check how your blade and fence line up is worth it, especially after heavy use or if you’ve been moving the saw around. An off-center blade can ruin your projects, so make it part of your routine to ensure everything is lined up properly.
Finally, where you store your saw matters too. Keep it in a dry, stable environment to avoid any warping or damage that can come from humidity changes. Protecting it from the elements helps keep it running smoothly.
Using a reliable multi-position ladder can enhance safety and precision during saw setup and adjustments.
Common Miter Saw Setup Mistakes to Avoid
Have you ever started a project, only to realize your miter saw is set up completely wrong? It’s beyond frustrating. Even if you keep your tools in great shape, a poorly aligned miter saw can throw off your cuts, leading to inaccuracies and wasted materials.
One common mistake is not checking the blade’s alignment with the table. This can create a noticeable gap between the blade and the material, messing up your precision. To avoid this, grab your combination square and check the miter gauge and bevel gauge. Make sure they’re locked in the zero-degree position before you cut. Simple but crucial!
If you’ve transported your saw, remember to recalibrate it. Misalignment can happen easily during transit, and it can really take a toll on cut quality if you don’t address it. Plus, don’t forget about the blade itself; a dull or warped blade can be a major hindrance to a smooth cut. Check the blade condition before you begin.
Here’s another tip: make sure the screw holding the miter gauge is secure. Loose screws can lead to movement while you work, which we definitely want to avoid. So, why does this matter? Each little step you take helps ensure your cuts are accurate and your projects turn out the way you envisioned.
To recap, double-check your blade alignment, keep an eye on your tool condition, and secure those screws. By steering clear of these common mistakes, you’ll be setting yourself up for success. Feeling ready to tackle that next project?
Also, consider using a table saw fence system to improve your cutting precision and enhance overall project stability.
Frequently Asked Questions
How to Align a Miter Saw?
To align our miter saw, we’ll focus on blade adjustment techniques, utilize bevel calibration methods, check miter gauge settings, perform saw blade inspection, and apply precision cutting tips for accurate results in our projects.
Why Is 31.6 on a Miter Saw?
That 31.6-degree angle on a miter saw guarantees precision in our cuts. By using this angle measurement, we achieve cut accuracy and perfect blade alignment, helping us make the necessary saw adjustments for flawless results.
How Do I Know if My Saws Need Recalibrated?
We recognize our saws need recalibrated when calibration indicators signal misalignment. Using accuracy tests, we can check blade alignment, and implementing troubleshooting techniques during regular saw maintenance guarantees our cuts remain precise and reliable.
How to Get a Miter Saw Perfectly Square?
Getting our miter saw perfectly square is like tuning a musical instrument. Through diligent miter saw maintenance, we can make precise blade adjustments, ensuring accurate cuts and proper saw table leveling for flawless crosscut techniques.


