As an Amazon Associate, we earn from qualifying purchases. Some links on this site are affiliate links at no extra cost to you. Our recommendations are based on thorough research and editorial judgment.

Crosscut vs Rip Cut: Understanding Wood Grain Direction
Have you ever been frustrated by a messy cut in your woodworking project? The direction of the wood grain can make all the difference when it comes to achieving clean, professional-looking results.
Rip cuts are made parallel to the wood grain. For these cuts, you’ll want a table saw with a rip blade that has about 24 to 30 teeth. This setup is perfect for smoother edges and makes quick work of larger pieces.
On the other hand, crosscuts go against the grain, which can lead to tear-out if you’re not careful. To nail these cuts, a miter saw or a crosscut sled with a blade boasting 60 to 80 teeth is the way to go.
So, why does this matter? Understanding wood grain direction lets you minimize tear-out, ensuring that your final pieces look sharp and polished.
Here’s the trick: take a moment to inspect the wood before you start cutting. Look at the grain and decide which cuts you’ll be making. This could save you from extra sanding later.
Honestly, taking these small steps can lead to big improvements in the quality of your work.
In the end, remember that aligning your cuts with the grain can be the difference between a project you’re proud of and one that needs more fixing up.
What approach do you usually take with your cuts?
Key Takeaways
- Rip cuts are made parallel to the wood grain, resulting in smoother cuts along the grain direction.
- Crosscuts are made across the wood grain, requiring precision to prevent lifting and rough edges.
- Understanding grain direction is crucial for effective cutting; rip cuts thrive with the grain, while crosscuts challenge against it.
- Using backer boards can minimize tear-out and improve cut quality during both rip and crosscut operations.
- Choosing the appropriate blade type significantly enhances cutting performance, with rip blades suited for ripping and crosscut blades for smoother finishes.
Understanding the Fundamentals: What Is a Rip Cut?

When you’re diving into woodworking, understanding rip cuts can really make your life easier. A rip cut is all about cutting parallel to the wood grain—perfect for trimming down the width of a board or resawing thicker pieces. Most folks use a table saw for this, and it’s smart to have a rip blade handy. This type of blade has fewer and larger teeth, which are designed specifically for slicing along the grain.
Now, here’s the thing: the cutting direction can leave you with rough edges, unlike a cleaner crosscut. So, you might find that you need to do some extra work, like sanding or planing, to get everything nice and smooth afterward. But why’s that important? Well, those rough edges could affect the look and fit of your project.
Let’s talk about safety for a sec. Rip cuts can lead to kickback, which is no joke. It’s super important to maintain control while you’re cutting; keeping your fingers and hands clear of the blade is essential. Remember to feed the wood steadily and keep your focus sharp—this isn’t the time for distractions!
Using a blade with the proper tooth count can improve cutting efficiency and reduce rough edges when performing rip cuts.
Understanding the Fundamentals: What Is a Crosscut?

Ever tried making a clean cut in wood, only to end up with jagged edges? If you’re looking to elevate your woodworking game, understanding crosscuts might be just what you need.
A crosscut is all about cutting across the wood grain, which means you’re slicing through multiple wood fibers at once. This method tends to be a bit trickier than rip cuts, requiring more precision to get those clean edges. And the best part? You might not even need to do extra sanding afterward. Tools like miter saws and crosscut sleds can really make a difference here. They help you control the angle and support the wood, so you get consistent results every time.
When it comes to blades, look for crosscut blades that pack 60-80 smaller teeth with alternating top bevels. These blades are specifically designed to glide through wood fibers smoothly, helping you achieve that professional finish. But don’t forget: careful measurement and alignment are key. Any little mistake can lead to uneven edges or worse—damaging your wood.
So, why does this matter? Mastering crosscuts can seriously boost your skills and make your projects look a whole lot better. Try putting these tips into practice in your next woodworking project and see the difference for yourself. Using precision tools like a self-leveling laser can also help ensure perfect measurements and alignments before making your cuts.
Why Grain Direction Matters for Cutting Methods

When it comes to woodworking, do you ever find yourself wrestling with cut quality? If you don’t pay attention to grain direction, those struggles can become a regular battle. Understanding how the grain runs through your wood is key to making those clean, precise cuts that we all want.
Doing rip cuts along the grain always feels smoother and more efficient, doesn’t it? You’ll notice they go quicker, and there’s a lot less chance of those pesky tear-outs ruining your project. On the flip side, crosscuts against the grain can be a real pain. It’s pretty common for fibers to lift and leave rough edges that just don’t look good.
So, how can you ensure you’re cutting in the right direction? Start by identifying the long grain, which is the direction running the length of the board. Cutting along this grain not only makes your work easier, but it also boosts the quality of your cuts. Here’s the trick: If you’re dealing with a tricky grain pattern, using a backer board can really help manage any tear-out that might occur.
Honestly, recognizing grain direction before you start cutting can save you a lot of headaches down the road. It helps you avoid misalignment, especially when working with challenging types of wood. Taking this time to check the grain can lead to a finish that’s truly polished and perfect for any fine woodworking project.
To wrap it up, keep grain direction in mind to elevate your woodworking game. Have you noticed how grain direction impacts your cuts? For better efficiency and safety when working with challenging grain, having a stable and durable miter saw stand can make a significant difference during cutting tasks.
Recommended Products
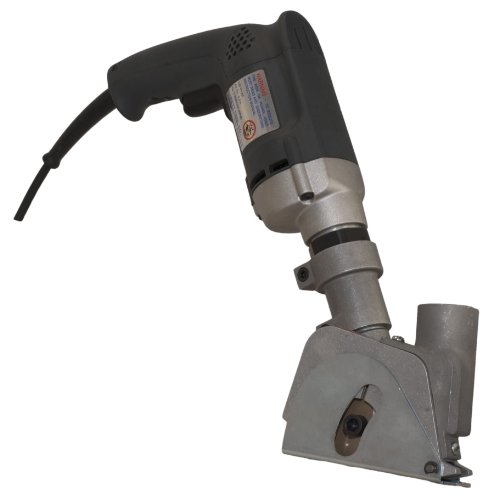
5.0 amp pistol grip, variable speed, 2500 RPM motor

UPGRADED COPING SLED - The Iton-Grip Coping Sled improves on our ever-popular original Coping Sled and beefs it up with a stiffer base, larger fence guide and the Iron-Grip clamp.

Premium Construction: Engineered with reinforced sides and high-quality extruded polystyrene foam, the Go Board ensures exceptional stability and waterproofing for lasting performance.
Blade Types for Rip and Crosscut Applications
Choosing the right saw blade can feel a bit overwhelming, especially when you’re diving into a new project. So, how do you pick between ripping and crosscutting? Understanding the types of blades available can make a world of difference in your woodworking journey.
For rip cuts, you’ll want to grab a rip blade. Look for one with 24-30 large teeth and a square-ground profile. This design helps you cut through wood efficiently along the grain without getting bogged down in material. If you’ve tried making rip cuts with the wrong blade, you know it can be a frustrating experience.
Now, let’s talk crosscutting. You’ll need something different here. Crosscut blades usually come with 60-80 smaller teeth and an alternating top bevel (ATB) configuration. This setup is perfect for making clean, precise cuts across the grain. You’ll appreciate the difference it makes when you’re aiming for a smooth finish on your project.
Thinking about using a combination blade? They’re a handy option with 40-50 teeth, giving you some versatility in your cuts. But keep in mind, while they’re convenient, they might not give you the same speed or surface quality compared to dedicated rip or crosscut blades.
Additionally, features such as thin kerf designs can minimize waste and improve cutting efficiency in both rip and crosscut applications.
Recommended Products

This beefy two-handed folding saw is Silky's answer to the "man-powered chain saw" 19.7" Cut Capacity, 2.6mm Blade Thickness
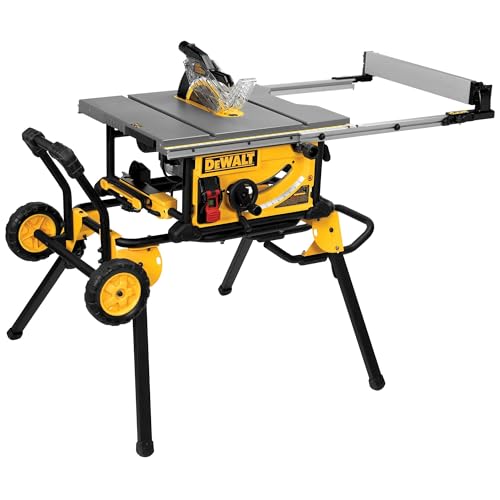
Rack & Pinion Telescoping Fence System Make fence adjustments fast, smooth and accurate

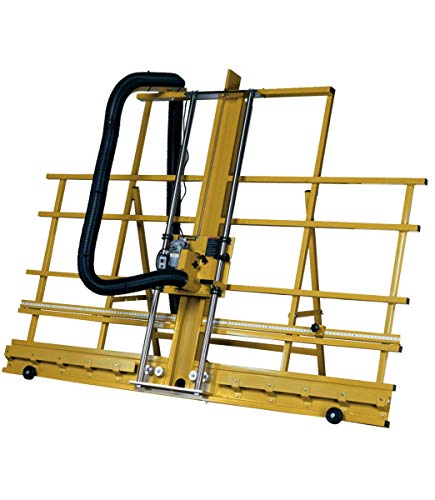
Saves 1/3 wood loss on each cut.
How to Pick the Best Tools for Rip and Crosscuts
When it comes to making rip and crosscuts, you might wonder how to pick the right tools for the job. It’s important to consider the specific design and intended use of each tool. For rip cuts, a table saw with a rip blade is your best bet. Look for one that has 24-30 large teeth; this setup makes quick, aggressive cuts along the grain a breeze.
Crosscuts require a different approach. Miter saws or crosscut sleds are excellent choices since they provide the support and precision you need for a clean finish. When you’re shopping for blades, keep this tip in mind: choose rip blades with fewer, wider-spaced teeth, while crosscut blades benefit from having 60-80 smaller teeth to ensure a smoother cut.
Regularly maintaining your blades can really pay off. Sharp saw blades not only improve cutting performance but also enhance safety, reducing the risks involved when you’re working on those cuts. So, why settle for anything less than the best tools for each task?
Prioritizing the right setup for rip and crosscuts is crucial for any woodworking project. Remember, using tools specifically designed for each type of cut will make all the difference in your results. Are your tools up to par for your next project? For enhanced safety and efficiency, consider incorporating multi-position ladders to reach precise cutting heights and angles comfortably.
Recommended Products
3-HP worm drive saw motor rotates in carriage to perform rip cuts


One-piece cast iron box trunnion provides the strongest stability of any Powermatic table saw
Key Techniques for Ripping and Crosscutting
Cutting wood can be a real challenge, especially when you’re trying to get those rip and crosscuts just right. It can be frustrating when the blade fights against the grain or leaves you with rough edges. So, what’s the trick to getting it all done smoothly?
When you’re ripping wood, make sure your blade is parallel to the grain. This little detail can make a world of difference by cutting down resistance and giving you a cleaner and smoother finish. Opt for a rip saw that has 24 to 30 teeth—these are perfect for gnawing through lumber without much hassle.
Now, let’s talk crosscutting. If you’re going against the grain, tools like a miter saw or a crosscut sled are your best buddies. They not only provide the support needed but also keep everything steady while you make that cut. It’s best to go with crosscut blades that have 60 to 80 smaller teeth. They help you make those clean edges without tearing the wood fibers. Plus, it’s crucial to keep a steady feed rate. Ever had a kickback? It’s not fun, so try to avoid it!
Here’s a thought: how often do you check your measurements before making a cut? It’s a step that some might overlook, but it really saves you from headaches down the road. When you crosscut, make sure you’re slicing carefully across the grain to minimize the chances of tear-out.
Using a compound miter saw can enhance your crosscutting precision and make angled cuts easier to achieve.
Recommended Products

MULTIPURPOSE - designed to cut hard/reinforced concrete, asphalt, granite, terrazzo or ductile iron piping

Powerful Performance: Equipped with a 15A copper motor and a no-load speed of up to 5300 RPM, our 10-inch table saw boasts exceptional cutting capability, effortlessly handling various hardwoods. This not only simplifies wood cutting projects but also significantly enhances your work efficiency.

DELIVERS UP TO 600 CUTS PER CHARGE (based on 2x4 crosscuts in SPF lumber)
Common Ripping and Crosscutting Mistakes
We’ve all been there—you’re in the middle of a project, and suddenly, things aren’t going as planned. Mistakes in ripping and crosscutting can really throw a wrench in your workflow. One major issue? Using the wrong blade. For ripping or crosscuts, a blade with smaller teeth is a recipe for disaster; it can create a mess of tear-out on the exit side.
Feeding wood too quickly during a rip cut can lead to kickback, which is not only dangerous but also messes up your cuts. It’s just not worth the risk. And let’s not forget about the importance of accurate measurements and alignment. Missteps in these areas can cause your workpieces to end up way off from the intended dimensions.
Here’s the trick: secure your materials properly. If they’re not clamped down tightly, they can shift unexpectedly, leading to cuts that just won’t be right. Keeping your setup precise can save you from these common headaches and help ensure a smoother project overall. Choosing the right tools and keeping them neatly organized, such as with socket organizer trays, can improve workflow efficiency and reduce frustration during woodworking tasks.
Understanding Grain Direction in Woodworking
Do you ever wonder why your cuts in wood aren’t as clean as you expected? Understanding grain direction in woodworking is a crucial part of getting those precise cuts you’re aiming for.
Grain direction is all about how the wood fibers are aligned. You’ve got long grain running parallel to the length of the board. When you cut with the grain, you’re basically allowing those fibers to separate easily, which leads to smooth, clean cuts. But cutting against the grain? That’s where you can run into trouble. It often results in tear-out, where the fibers get ripped up, especially in unsupported areas.
So, how can you figure out which way the grain is running? Just take a good look at the grain lines on the edges of the board. This quick check can save you a lot of headaches down the line by helping you establish the best cutting orientation.
Here’s the trick: mastering grain direction not only improves the quality of your work, but it also ensures you get that professional finish you’ve been dreaming about.
Using tools with adjustable depth features can further enhance precision when cutting along different grain directions.
Truth is, when you really pay attention to grain direction, everything from large projects to small details can turn out a whole lot better. Are you ready to see how simple adjustments can enhance your woodworking game? Give it a try and notice the difference!
How Grain Direction Affects Tearout and Finish Quality?
Have you ever struggled with tearout when cutting wood? It’s frustrating, especially when you’re aiming for that perfect finish. The key player in this whole scenario is the grain direction. When you cut with the grain, you usually get a much cleaner cut. That’s because the blade slices through the fibers instead of tearing them apart. On the flip side, cutting against the grain can lead to all sorts of issues like lifted fibers and rough edges.
To keep your cuts looking sharp, a few tips can really help. First off, always use sharp blades. Dull blades are more likely to pull and tear the fibers, leading to that dreaded tearout. If you’re working with figured wood, being mindful of the cutting technique is even more critical. Another trick? Use backer boards. They can help support those unsupported fibers during the cut, providing more stability and improving the overall finish.
So, why does understanding grain direction matter? Well, cutting along the long grain makes for an easier separation of fibers, whereas cutting across the short grain heightens your tearout risk. It’s all about being deliberate with your cuts. Just take your time, think about the direction of the grain, and you’re likely to see better results. Additionally, using chisels made with high-carbon steel ensures a sharper edge for cleaner cuts and less tearout.
In the end, a bit of awareness can go a long way. What techniques have you found work best for managing tearout?
Tips for Achieving Cleaner Cuts in Woodworking
Are you tired of those rough, jagged edges on your woodworking projects? Let’s get into some solid tips to help you make cleaner cuts that will really elevate your work.
First off, it’s crucial to use sharp blades that match your specific task. Think about using rip blades for ripping and crosscut blades for, well, crosscuts. Trust me, choosing the right blade can seriously improve the quality of your cuts.
When you’re cutting, always follow the grain direction. Why does this matter? Cutting with the grain minimizes tear-out, which leads to much smoother edges. If you’re making crosscuts, consider grabbing a miter saw or a crosscut sled. Not only do these tools help you achieve precise angles, but they also give your workpiece plenty of support.
Got some figured wood on your hands? Make sure to align your cuts with the main grain direction. Using backing materials can also help keep those messy fibers in check.
And let’s not forget about maintenance. Regularly calibrating your saws and keeping your blades sharp makes a world of difference. It translates to better performance and a safer experience in your workshop.
Also, selecting a blade with a higher tooth count can significantly enhance the smoothness of your cuts, especially when working on detailed projects.
Recommended Products


Adjustable Shank - Shank Height: 17", Hole Spacing: 1-1/2", Hole Diameter: 5/7'', the ripper/scarifier tooth comes crimped to the box blade shank. Each Shank features three adjustable hole settings, making it handy for a range of cutting and grading tasks.

Specs: Arbor 1", Diameter 15", Grind TCG, Hook Angle -7°, Kerf .142", Plate .118", Teeth 108
Frequently Asked Questions
How to Tell Which Way the Wood Grain Goes?
When we’re working with oak, noticing its tight grain pattern helps us identify wood grain direction. Understanding grain orientation impacts our cuts, and tools like magnifiers can enhance wood grain identification for smoother results.
Does a Rip Cut Go Against the Grain?
A rip cut doesn’t go against the grain; it follows it. Using proper rip cut techniques and understanding wood grain characteristics helps us choose appropriate saw blade types, ensuring smooth edges in our woodworking projects.
How to Tell a Crosscut Saw From a Rip Saw?
We can tell a crosscut saw from a rip saw by examining the saw tooth design, which differs greatly. Crosscut saws have finer, sharper teeth, while rip saws feature larger teeth designed for aggressive cutting techniques.
Is a Crosscut When You Are Cutting Wood Perpendicular to the Wood Grain?
When we wield crosscut saws, we’re cutting wood perpendicular to the grain. Mastering this cutting technique lets us perfect lumber dimensions, revealing beautiful grain patterns. Our saw blades glide smoothly for stunning woodworking results!


