As an Amazon Associate, we earn from qualifying purchases. Some links on this site are affiliate links at no extra cost to you. Our recommendations are based on thorough research and editorial judgment.

How to Measure Twice Cut Once: Layout Fundamentals
Got a project lined up and worried about making that perfect cut? You’re not alone. We all know the frustration of measuring wrong and having to start over, which is why the “measure twice, cut once” rule is golden.
To really nail this principle, you need dependable tools. A solid tape measure or a carpenter’s square is essential. Before you make any cuts, take a good look at your material and measure multiple points. It’s a good idea to mark your spots with a fine pencil—precision is key. Don’t just wing it! Think about investing in something like the Bosch GLM 50 laser distance measurer. It can help you get that extra layer of accuracy.
Once you’ve made your marks, always double-check them against your project specs. It might seem tedious, but trust me—it’s much less hassle to take an extra minute than to fix a mistake later on.
Are you feeling a bit more confident in your measuring skills? Frankly, attention to detail in layout can significantly boost your woodworking quality and make your final pieces so much more satisfying.
In short, measuring accurately can save you time and frustration down the road. So, are you ready to take your woodworking to the next level?
Key Takeaways
- Always measure at multiple points on the material to identify any variations before making cuts.
- Use reliable measuring tools, like heavy-duty tape measures and carpenter’s squares, to ensure accuracy.
- Mark your measurements clearly with fine pencils to avoid ambiguity and errors in cutting.
- Implement modern tools, such as laser distance measurers, for quick and precise measurements.
- Document all measurements and adjustments to refine your skills and avoid repeating mistakes in future projects.
Why You Should Measure Before Cutting

Have you ever jumped into a project only to realize later that you measured wrong? It can be frustrating, but measuring before cutting is crucial if you want your project to run smoothly. Taking a little extra time to measure twice can make a huge difference in the end result.
Studies show that one small mistake in measurement can bump your project costs up by 20%. That’s a wallet hit that nobody wants to deal with. So, it’s best to use fixed references for your measurements to stay consistent. By checking your dimensions at the beginning, you’re not just saving materials; you’re also cutting down on the time spent fixing mistakes later on.
Here’s the trick: remember that old saying, “measure twice, cut once”? It’s more than just a catchy phrase; it’s a principle that’s worth adopting. Late changes or fixes can be ten times more expensive than addressing issues upfront.
So, why does this matter? Being vigilant about your measurements can save you a lot of headache down the road. You want your hard work to pay off, and a little patience in the planning phase can make all the difference. Using tools with ergonomic handle design can also help reduce strain during measurement and cutting tasks.
Top Mistakes Woodworkers Make When Measuring

Many woodworkers hit some speed bumps when it comes to measuring, and it can really throw a project off course. One of the biggest pitfalls is forgetting to double-check your measurements. If you skip this step, you might end up with pieces that are too short, leading to wasted time and materials.
Aligning your measuring tool with the wood edge is critical. If your tape isn’t lying flat against the material, you’re likely to create some serious errors. Here’s the trick: use the blade of your tape measure, not just the end, to ensure you’re getting the exact length you need. And let’s be honest—just relying on the width of your pencil line can make it tough to find those precise measurement points. Aim for clarity and accuracy when you’re marking.
Switching between imperial and metric systems can also trip you up. It’s easy to mix things up and confuse your cutting dimensions, which adds unnecessary headaches. So, keep it consistent; decide on one system and stick to it throughout the project.
Don’t overlook environmental factors either. Humidity can cause materials to expand or contract, and this can alter your measurements. If you’re taking on a new project, make it a habit to account for these changes.
Using titanium nitride coated drill bits can also enhance precision in your woodworking projects by ensuring cleaner holes and reducing drill slip, which complements precise measuring and cutting techniques.
In short, staying vigilant about your measurements can save you a lot of frustration. So, next time you pick up your tools, ask yourself: are you measuring twice? It’s a small adjustment that can make a huge difference in your final project!
Recommended Products

Jobber length drill bit has a midrange drilling depth for general-purpose applications

Magnetic Drill Annular Cutter Kit (12pc x 2")

Steps to Effectively Measure and Mark Materials

Ever find yourself measuring materials for a woodworking project and feeling a bit lost? It can be frustrating when those dimensions don’t add up, and mistakes can cost you time and resources. So, let’s break this down into simple steps to make things easier.
First off, grab some reliable measuring tools. A heavy-duty tape measure or a precision ruler can make a world of difference. Trust me, having the right tools ensures you get those dimensions right, cutting down on those pesky errors.
Next, marking your measurements is key. Use a fine pencil or a specialized marking tool to make clear lines for your cuts. You want your lines sharp and precise—nothing is worse than a wobbly cut due to a poor mark. If you’re working on corners, a square or T-square can be a lifesaver. These tools help you create and check for right angles, which is crucial in woodworking.
When it comes to large sheets, here’s a handy tip: mark cutting lines on both sides. This little trick enhances visibility, and it’ll help you stay on track as you cut.
Additionally, using high-quality tools like Freud router bits can improve the precision and quality of your cuts.
Everyone makes mistakes now and then, but by following these steps, you’ll set a solid foundation for your projects. Less chance of errors means you can focus more on creativity rather than fixing mistakes. So, ready to dive into your next woodworking adventure?
Recommended Products
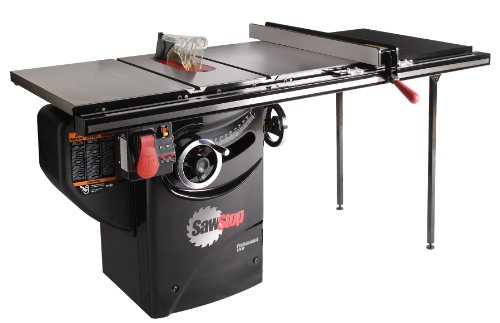
36-INCH T-GLIDE FENCE ASSEMBLY: The 36-inch T-Glide Fence & Rail are made of heavy-gauge steel for sure lockdown and reliably square cutting for years without deflection.


Heavy-Duty - The Starrett Micrometer are made to last with quality materials that ensure durability and better work performance. It comes with an adjusting wrench and a smooth friction thimble for uniform pressure.
How to Double-Check Measurement Accuracy Before Cutting
Before you start cutting, you might want to pause for a moment and double-check your measurements. Trust me, getting this step right can save you a heap of time and material. First off, think about your tools. You want to ensure that your tape measure or carpenter’s square is reliable. It’s so easy to miss a small calibration issue—damaged tools can lead to big mistakes!
Next, take measurements at different points on your material. Why should you do this? Because even small variations can throw off your cuts. As you mark your measurements, why not try using different colors? It makes it a lot easier to cross-check dimensions without getting lost in a sea of numbers.
Now, here’s a solid tip—grab a friend to help you out. Having a second set of eyes can really catch mistakes that you might miss. Finally, make sure you have your project’s design specs on hand. Double-check your measurements against these specs to ensure everything lines up perfectly before grabbing that saw.
In short, measuring accurately takes a little extra time, but it’s definitely worth it in the long run. How often have you regretted rushing through a measurement? Remember that a little patience now can prevent a lot of headaches later! Also, consider using precision tools that meet performance standards to increase your measurement reliability.
Tips for Tools That Ensure Accurate Layout
Accurate layout can make or break your project. We can all relate to the frustration of measuring something only to realize it’s off by a few inches, right? Reliable tools are your best friends when it comes to precision, and each tool in your kit really has its part to play.
When you’re picking out measuring tape, it’s key to go for one that has clear markings. It makes reading measurements a breeze and cuts down on potential errors. I’d recommend the Stanley FatMax 25-foot tape measure for its versatility—it’s just long enough for most jobs without being too bulky. You definitely want this in your toolbox.
Next up is the carpenter’s square. This tool is crucial for making sure your cuts are spot on, confirming right angles like a boss. I can’t stress enough how much a good square can save you from making extra cuts or adjustments later on.
Have you considered a laser distance measurer? Take a look at something like the Bosch GLM 50. It’s fantastic for quick and precise measurements, which is a real blessing when you’re trying to work solo. These gadgets seriously help to reduce the human error in measuring.
For larger surfaces, it’s worth using a chalk line. It lets you snap a straight line that guides your cuts perfectly. Honestly, there’s nothing worse than cutting crooked lines that mess up your whole project. And when you’re marking your materials, grab a sharp pencil—it’ll give you visibility and help avoid those annoying smudges that can lead to mistakes.
Additionally, incorporating a rotary laser level can significantly improve your accuracy by providing precise horizontal and vertical alignment over large distances.
In short, having the right tools makes all the difference in achieving an accurate layout. Next time you plan a project, think about your toolkit. What tools do you find are essential for keeping things precise?
Recommended Products
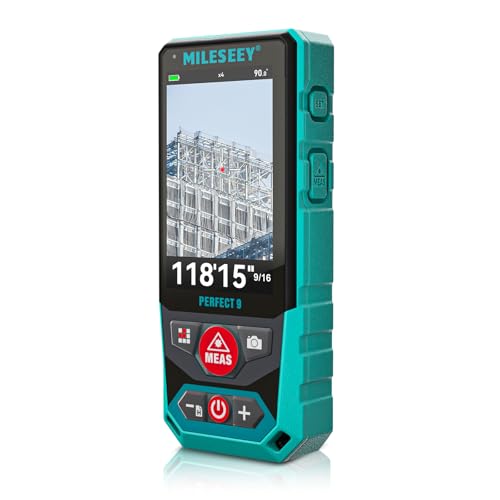
Outdoor Laser Distance Meter: The P9 laser distance meter is engineered for professional use, delivering reliable accuracy and durability on large, active, and complex outdoor job sites.

DIGITAL VIEWFINDER: delivers 5.0 megapixels with adjustable zoom to locate the laser spot at far distances.

[Effortless Measuring, Near or Far] Combines a 12ft digital tape measure and a 330ft laser distance meter in one compact tool—no need to switch devices. Easily handle short, detailed measurements for woodworking or long-distance measuring for home renovation, construction, and DIY projects with speed and accuracy
Adapting Measuring Techniques for Today’s Woodworking
Have you ever struggled with getting accurate measurements on your woodworking projects? It happens to the best of us. That’s why it’s important to consider modern measuring techniques that can really make a difference in your work.
Using digital tools like laser distance meters and digital calipers can seriously boost your measurement accuracy. These gadgets are great at cutting down errors, which is key for any project. Plus, they’re usually pretty easy to use once you get the hang of them.
Another trick? You can set up grid layouts and plot templates right on your work surface. This not only helps visualize your measurements but allows you to double-check them before making your cuts. Let’s face it, a small mistake can lead to a big headache down the line.
When you’re dealing with complex shapes, don’t hesitate to check your measurements against multiple reference points. It’s a simple step that can save you a lot of time later. If you’re unsure, try making mock-ups or test cuts with scrap materials. This way, you can validate your techniques, ensuring your final cuts are spot on.
Frankly, it’s also helpful to document your measurements and any adjustments you make along the way. This habit can help you refine your skills over time and track your progress. For enhanced usability, consider tools that feature Pythagorean calculations to easily determine indirect measurements and improve precision.
Continuous Improvement in Your Woodworking Process
Ever felt stuck in a woodworking rut? You’re not alone. Continuous improvement is key to not only sharpening your skills but also to transforming your projects into something you can truly be proud of.
One great way to boost your abilities is by getting feedback from others who have been in the game longer than you. Try asking experienced woodworkers for their thoughts on your technique. They can point out flaws you might not even notice, which can help you improve fast.
Another solid tactic is keeping a project log. Document everything—your decisions, the measurements you took, and the outcomes. This simple practice will show you how far you’ve come and keep you from repeating the same mistakes over and over.
When it comes to trying out new tools, don’t just dive into the deep end. Testing something like the DeWalt DWS779 miter saw on scrap wood can be a smart move. You get to play around with it, refine your methods, and all the while, you’re minimizing waste.
Prototyping is also a great way to fine-tune your designs. It helps you make adjustments before committing to those final cuts. This can save you not only time and materials but also lead to projects that are far more polished.
To enhance efficiency and accuracy during your cuts, consider using a miter saw with adjustable cutting capacity, which allows for greater versatility in handling various materials.
So, what’s the takeaway? Continuous improvement doesn’t have to be a daunting task. By seeking feedback, logging your projects, experimenting with tools, and prototyping your designs, you’ll find success—and that sense of fulfillment—along your woodworking journey.
What will you try first?
Frequently Asked Questions
How Do You Measure Twice and Cut Once?
To measure twice and cut once, we should apply accuracy techniques with our cutting tools, utilize layout strategies like marking clearly, and always validate measurements from various perspectives to guarantee precision and avoid mistakes.
What Is the Measure Twice Cut Once Principle?
The “measure twice, cut once” principle’s like a tightrope walk; we prioritize measurement techniques and cutting accuracy with precision tools. By doing so, we minimize mistakes and guarantee success in our projects together.
What Does It Mean to Measure Twice Cut Once?
To measure twice, cut once means we prioritize accuracy techniques in our projects. By following woodworking tips and ensuring construction safety, we minimize mistakes and enhance our final results. Let’s commit to precision together!
Why Is It Important to Measure Twice Before Cutting?
It’s essential we measure twice before cutting to guarantee accuracy in measurements, preventing mistakes that could lead to waste. By doing so, we’re not only saving materials but also enhancing the quality of our projects.


