As an Amazon Associate, we earn from qualifying purchases. Some links on this site are affiliate links at no extra cost to you. Our recommendations are based on thorough research and editorial judgment.

How Clutch Settings Work on Cordless Drills
Have you ever struggled with screwing in a fastener, only to find it gets stripped or sinks too deep? That’s where drill clutch settings come into play. These handy features on cordless drills let you control the amount of torque during your fastening tasks.
The settings usually range from 1 to 15. Lower settings like 1-5 are great for softer materials, while higher settings, from 11-15, handle tougher stuff like hardwood or metal. The trick is knowing when and how to adjust these settings. When you hear that clicking sound, it’s your drill telling you it’s reached its torque limit. That noise is your cue to stop, preventing overdriving the screws.
A smart way to get the hang of this is to test out different settings on some scrap materials before diving into your project. This ensures you hit the right depth without causing damage. Trust me, it saves time and a lot of frustration down the line.
So, why does this matter? Properly using your clutch settings can mean the difference between a smooth project and a headache of mistakes. Frankly, not all materials react the same way, and being equipped with this knowledge gives you more control as you work.
To wrap it up, getting to know your drill’s clutch settings can make your projects easier and more efficient. Next time you pick up that cordless drill, remember—it’s not just about getting the job done, but doing it right. What project will you tackle next with this newfound know-how?
Key Takeaways
- Clutch settings on cordless drills regulate torque to prevent overdriving screws in various materials, ensuring efficient fastening.
- Lower settings (1-5) are ideal for softer materials, while harder materials require higher settings (11-15) for effective fastening.
- The clutch disengages with a clicking sound when the set torque is reached, indicating to stop tightening.
- It’s crucial to test torque settings on scrap materials before main projects to ensure proper adjustment for specific materials.
- Common mistakes include neglecting to adjust the clutch based on material type and leaving it at the highest setting inadvertently.
What Are Drill Clutch Settings and Their Purpose?

Have you ever struggled with drilling into different materials? It can be tricky figuring out how much torque you need for each project, and that’s where drill clutch settings come into play. These settings are your best friend when using cordless drills because they control the amount of force applied while fastening.
Most drills let you adjust the clutch setting anywhere from 1 to 15, or even higher in some cases. A lower setting is perfect for softer materials like drywall—this way, you avoid overdriving screws and damaging the surface. On the flip side, when you’re working with tougher materials like hardwood, you’ll want to crank up that clutch for the extra torque.
You might even notice your drill making a clicking sound; this is the clutch disengaging, signaling you’ve reached the right torque level. So, how do you know what setting works best for you? The truth is, it varies depending on your specific drill brand and model, so you’ve got to experiment.
Here’s a small tip: Start at a lower setting and gradually increase it until you feel comfortable. This not only helps you get the hang of your drill but also refines your technique.
Additionally, many cordless drills feature adjustable speed settings that work hand-in-hand with clutch settings for better control based on your project needs.
To recap, understanding drill clutch settings can make your life a lot easier when tackling different projects. So, why not take some time to test out those settings? You just might find the right balance for your next DIY endeavor!
How Do Clutch Settings Control Torque?

Have you ever been frustrated while trying to drive screws? Getting the right torque can make all the difference, especially when using cordless drills. Understanding how clutch settings control torque is key to getting those screws in just right without damaging your materials.
The clutch in your drill is what determines how much torque gets applied. It works by engaging or disengaging power based on pre-set levels. So, if you set a higher clutch number, you’re going to get more torque. This means you can adjust the pressure you place on screws and avoid overdriving them, which can lead to stripping or breaking. When you reach the torque limit you set, listen for the drill to emit that telling clicking sound—it means it’s disengaged and you’re all set.
So, what are good clutch settings for different materials? If you’re working with softer materials, you typically want to adjust your clutch between 1 and 5. For harder materials, crank it up between 11 and 15. This helps ensure you drive efficiently while avoiding any damage to the material. It really helps to test the torque outputs, as different brands and models can vary. Always adjust your settings for the best results.
Truth is, knowing your way around these clutch settings can save you a lot of headaches down the road. Next time you grab your drill, take a moment to think about the material you’re working with and adjust accordingly. You should also consider the power source of your drill, as cordless models with higher voltage batteries generally offer more consistent torque for demanding tasks. Are you ready to tackle your next project with confidence?
Why You Should Adjust Torque for Different Materials?

Have you ever found yourself struggling to drive screws into different materials? It can be frustrating when your tool just doesn’t seem to get the job done. That’s where adjusting your torque settings comes into play. Trust me, making these tweaks can make a world of difference when you’re working with various materials.
When you’re dealing with softer materials, like drywall, consider dialing down the clutch to a lower torque setting (between 1-5). This helps prevent surface damage that can ruin your project. On the flip side, harder materials—think hardwood or pressure-treated wood—require a higher torque setting (around 11-15) to effectively drive those larger screws in. If you don’t adjust accordingly, you might end up with camout or stripped screws, which only leads to headaches later on.
Before jumping into your main project, here’s a good practice: test your torque settings on some scrap material first. This simple step can help you figure out if the torque is suitable for the size and type of screws you’re using. It’s all about avoiding mishaps and ensuring everything runs smoothly from the get-go.
For optimal performance, also consider the power source compatibility of your cordless tool, as this affects driving efficiency and battery life.
What Happens at the Torque Limit?
Ever been in the middle of a project and suddenly felt your drill just won’t tighten that last screw? That’s what happens when you hit the torque limit. The drill’s clutch kicks in to protect you from driving screws too deep, which can save you from some really annoying mistakes. You’ll usually hear a clicking sound when this happens—like a little warning that tells you, “Hey, stop right there!”
This disengagement operates kind of like your car’s transmission, controlling the power to keep you from stripping screws or damaging the material you’re working on. Not all drills behave the same way, though. For example, the torque engagement points differ among models like the DeWalt DCD771 and the Makita XFD131. So, what should you do when you reach that limit?
Here’s the trick: pay attention to the materials and screws you’re using, and adjust your settings accordingly. This simple step can help you get the best performance out of your drill while extending its life. You wouldn’t want to wear out your tools from excessive use at the torque limit, right?
Truth is, understanding how your drill’s clutch works can save you a lot of headaches down the line. It’s all about knowing your tools and how they function. Have you ever adjusted your settings based on what you’re working on? It might change the way you approach your next project.
Many cordless impact drivers also feature multiple speed settings to better match torque and speed requirements for different tasks.
How to Adjust Your Drill’s Clutch Settings Like a Pro
Adjusting your drill’s clutch settings can be the difference between a smooth project and a frustrating mess. Have you ever stripped a screw or damaged drywall? It’s the worst. That’s why understanding your clutch settings is key when working with different materials.
Start by twisting the collar toward the lower numbers—this is especially helpful when dealing with delicate materials like drywall. Using settings from 1 to 5 can prevent overdriving, making all the difference. When you adjust the clutch, listen for that little click; it means the drivetrain has disengaged at the right torque limit. This not only saves your materials but also protects the fasteners you’re working with.
When you’re on to medium-density materials, bump it up to settings between 6 and 10. For tougher materials, consider going higher, around 11 to 15. Here’s the trick: before diving into your actual project, practice on some scrap pieces. It helps build your confidence and understanding of how your drill performs at different settings.
So, why does this matter? Getting cozy with your drill’s clutch settings ensures you won’t have mishaps that could lead to more work later on. Trust me, the last thing you want is damage from overdriving or stripping screws.
To wrap it up, spend a little time experimenting, and listen for that reassuring click. What materials are you excited to work on next? Remember that keeping your tools organized and protected in a durable jobsite tool box will help maintain their performance and longevity.
Recommended Products

DEWALT hammer drill has 6.1 Joules of impact energy for fast drilling and chipping, even in the hardest concrete.

Efficient BL Brushless motor is electronically controlled to optimize battery energy use for up to 50% longer run time per charge

This IQV20 3-Piece Cordless Combo Kit includes the W7153 DXS Impact Wrench with AK33HH 3-Piece DXS Anvil Set (contains 3/8", 1/2", and 3/4" standard-length anvils); D5241 Hammer Drill, D3411 Screwdriver, two BL2022 5.0Ah Batteries, and one BC1124 Compact Charger
How to Apply Drill Clutch Settings in Real Projects
To really nail those clutch settings on your drill for real projects, it helps to start with understanding the material you’re dealing with. For instance, soft surfaces like drywall? Go with the lowest setting (1-5) to prevent overdriving and tearing the material. Medium-density materials, such as plywood, can take a mid-range setting (6-10), which gives you enough power without risking damage. But when you’re working with harder woods, like hardwood or pressure-treated lumber, you’ll want to crank it up to a higher clutch setting (11-15). This way, you get the torque needed while minimizing the chances of camout or stripping.
Here’s a tip: always test on a scrap piece first. That’s the best way to figure out what works before you dive into the actual project. Remember, when you hear that clicking sound of disengagement, it means you’ve hit the set torque, which helps ensure your screws go in at a consistent depth. For thorough inspections during your projects, consider using an articulating borescope to better view hard-to-reach areas.
Recommended Products

Tapping Capacity: M6 to M36; Working Direction: Universal; Working Radius: Horizontal 1200mm and Vertical 400mm; Rotation Speed:125r/min.

Tough 3 speed all metal transmission for increased runtime and longer tool life

Common Mistakes With Drill Clutch Settings
Ever tried tackling a project only to have things go sideways because of your drill clutch settings? You’re not alone. It’s tempting to just set it and forget it, but there are some common pitfalls that can really trip you up.
One of the biggest mistakes is leaving the clutch on the highest setting. This can lead to overdriving screws, which might strip them or even damage your fasteners. You’ll want to adjust the clutch based on the material you’re working with, whether it’s softwood that can strip easily or harder surfaces where you need more power to drive the screws home.
Don’t overlook the clicking sound that signals the clutch is disengaging. Ignoring that can cause serious issues down the road. Here’s a tip: before diving into your main project, test your clutch settings on some scrap materials. It helps ensure your screws go in at a consistent depth, so you won’t end up with an uneven finish.
And let’s not forget about the drill mode. Switching to this when creating holes is crucial. If you skip it, your drill might suffer damage, and trust me, that’s not something you want to deal with.
For projects needing precise assembly, using tools like corner clamps can help maintain accuracy while working with your drill.
Recommended Products

CONNECTED COMBO KIT: Has two tools (impact driver/wrench and hammer drill/driver) for power, two CORE18V batteries and a charger
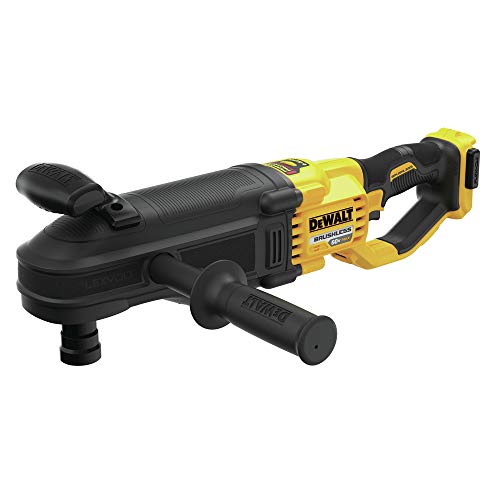
DEWALT anti-rotation E-Clutch System of the right angle drill offers technology capable of detecting the motion of the tool and shuts it down in a bind-up situation. The red indicator LED illuminates when the E-Clutch System is engaged.

2607-20 HAMMER DRILL / DRIVER: This cordless hammer drill / driver is specially suited for driving holes through softwoods, hardwoods, and masonry. Switch between 3 different drill settings with the top mounted switch and 18 different torque settings with a clutch attached to the keyless chuck
Tips for Mastering Drill Clutch Control
Mastering drill clutch control can feel a bit daunting at first, but getting it right can really boost your efficiency in various projects. Have you ever found yourself overdriving a screw or struggling to get the right depth on different materials? Don’t worry, you’re not alone.
Start out with lower clutch settings (1-5) when working with soft materials like drywall. This will help you achieve a clean finish without the mess of overdriving. As you move on to medium-density materials like plywood, it’s smart to bump it up to medium settings (6-10). This way, you’re in better control of the torque and can avoid those frustrating mishaps.
For harder materials, you’ll definitely want to use higher settings (11-15) to get the max torque for those tough jobs. And here’s a little tip: listen for that clicking sound! It’s a signal that you’ve hit the set torque limit, which means the motor has disengaged to help prevent overdriving. Honestly, waiting to hear that click can save you a lot of headaches down the road.
If you take some time to practice on scrap materials, you’ll start to see how each clutch setting changes the torque and depth. This preparation is so important before jumping into the actual project.
To wrap it up, mastering drill clutch control is all about practice and understanding your materials. Have you tried adjusting the clutch settings on different surfaces? It could make a world of difference in your next project!
Also, using durable materials in your drill’s clutch mechanism can enhance its longevity and reliability over time.
Recommended Products

SPLINE BIT SYSTEM — ACCOMMODATES ALL ACCESSORIES WITH SPLINE OR 3/4 IN. ROUND HEX SHANKS
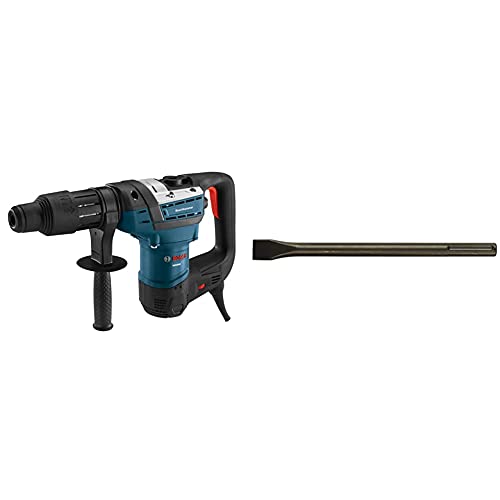
The BOSCH RH540M Combo Rotary Hammer features the SDS-max Bit System for tool-free bit changes with automatic bit locking, dust protection and maximum impact energy transfer rate.

2607-20 HAMMER DRILL / DRIVER: This cordless hammer drill / driver is specially suited for driving holes through softwoods, hardwoods, and masonry. Switch between 3 different drill settings with the top mounted switch and 18 different torque settings with a clutch attached to the keyless chuck
How to Troubleshoot Clutch Issues on Your Drill
Ever find yourself in the middle of a project, only to realize your cordless drill isn’t cooperating? Clutch issues can seriously throw a wrench in things. The first step is to give the clutch mechanism a good look. Dirt or debris can get in there and mess up its function, so make sure it’s clean.
If you hear a clicking sound when you engage the clutch, that’s usually a good sign, but check the torque setting, too. You want it to match the material you’re drilling into. If you’re struggling to drive screws all the way in, try increasing that torque setting a little at a time.
Now, if your drill suddenly disengages while you’re using it, it might be time to inspect the batteries and motor. And here’s a tip: if you’re experiencing unexpected kickback, it could be a sign that your torque setting is too high—especially when working with softer materials or smaller bits.
To extend battery life and maintain performance, it’s important to fully charge batteries according to the manufacturer’s recommendations before use.
Recommended Products

Longer runtime and improved performance

This refurbished product is tested and certified to look and work like new. The refurbishing process includes functionality testing, basic cleaning, inspection, and repackaging. The product ships with all relevant accessories, and may arrive in a generic box

Longer runtime and improved performance
Frequently Asked Questions
How to Use Clutch Settings on Drill?
Ever wondered how we perfect our projects? We adjust the clutch torque for precise control, choose the right drill bit, and guarantee our rechargeable batteries are maintained. Let’s make our drilling effortless and efficient together!
What Is the Purpose of the Clutch on a Cordless Drill?
The clutch on a cordless drill helps us manage torque adjustment techniques. By understanding the clutch function analysis, we can guarantee drill bit compatibility and prevent damage, achieving precise and safe screw driving for our projects.
What Does Turning the Clutch Collar Do?
When we turn the clutch collar, we’re making torque adjustments in our drill configuration. It’s like fine-tuning a vintage guitar, ensuring we apply just the right amount of force for perfect screw depth without damage.
How Does a Cordless Drill Speed Control Work?
Cordless drill speed control lets us adjust speed variation and torque adjustment based on pressure applied to the trigger. This balance impacts battery usage, ensuring efficient performance while prolonging battery life during our projects.


